Mästermyr Chest
By Lord Thomas Boardmakere
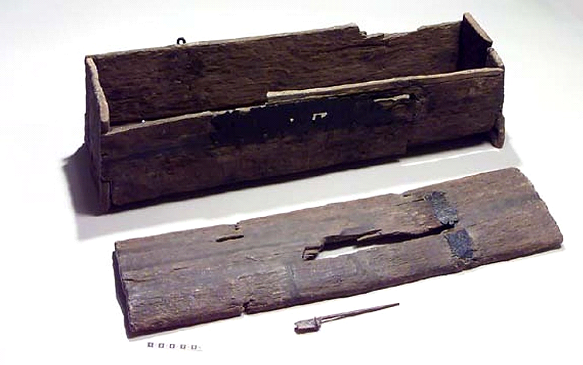
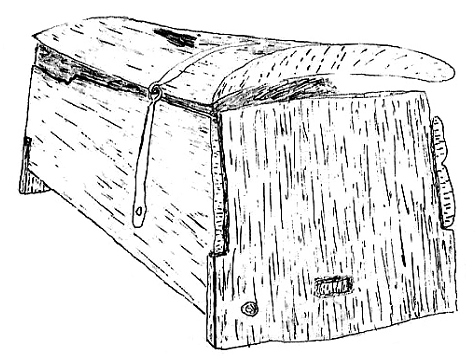
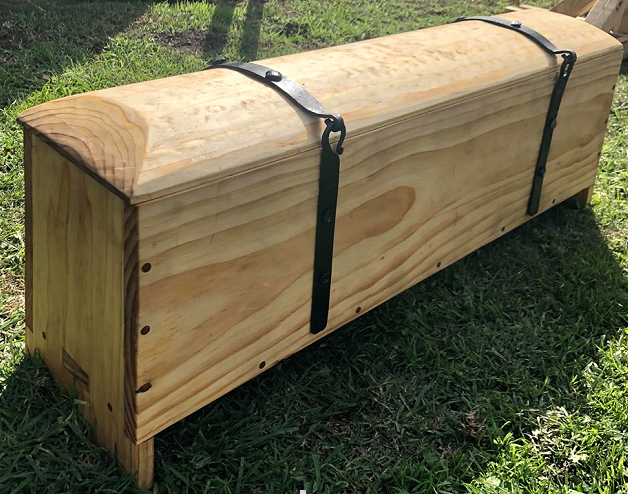
In 1936 a farmer was ploughing a field and dug up a box wrapped in a chain.
It turned out this oak box was around a 1000 years and contained over 200 objects from the dark ages, making it one of a few chests and the largest tool find from that area.
Now known as the Mastermyr chest it is displayed in the Swedish History Museum in Stockholm ref no. 21592 and has held the interest of researchers and reenactors ever since.
It’s not just the chest contained house hold objects, it held the tools of a craftsmen with which the owner built a wide range of house hold objects.
This equipment included woodwork, bone work,mblack-smithing, copper-smithing, sharpening stones, jewellery crafts, lock-smithing, and cooking food.
As a renactor who is hoping to dive into all of these areas I have decided to attempt to build a faithful creation of this chest to contain my tools as I transport them to events.
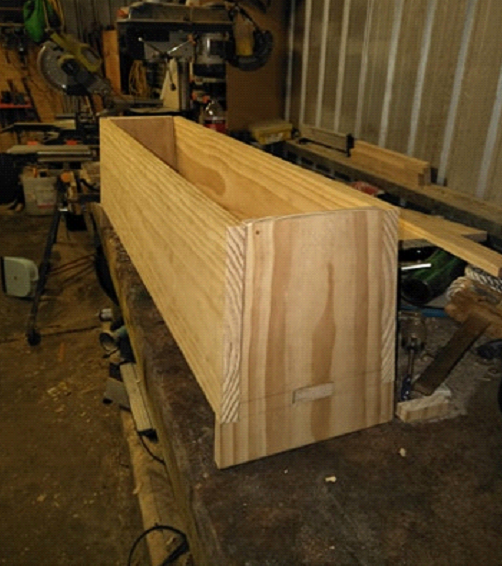
Basic measurements – Length 89 cm, Width 26 cm, Height 24 cm.
Material Choices
Timber
The original is made of oak boards, but I don’t have access to that, so I have chosen to use pine, which is a timber we see used in other wood work of the time period (i.e. buckets).
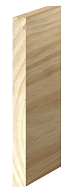
Claymark 235 x 19mm x 1.2m Premium Grade Dressed Pine Sheet
We will need 5 of these boards
Note: since pine is a weaker timber these boards are thicker than the originals

Tasmanian Oak Dowel 8mm
I do not currently have a recipe from period glue so I’ll be using PVA.
Metal
All metal fixings will be mild steel, as it’s the closet we have these days to dark ages iron without working from bloom steel.
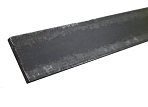
20mm x 3mm flat bar for hinges
8mm round bar for nails
Raw linseed oil as a finish for both steel and timer.
Tools
Timber Work
- Hand saw
- Straight edge
- Scribe
- 8mm auger bit
- 16mm auger bit
- Brace
- 15mm chisel
- Plain
- Spoon knife
- Carving knife
- Rags
- Clamp
- 3mm drill bit
- Mallet
- Marking gauge
Metal Work
- Ball peen hammer
- Anvil
- Forge (I used gas)
- Nail header
- Punches
- Drifts
- Pliers
- Quench tank
- Hot cut tool
- 5mm drill bit
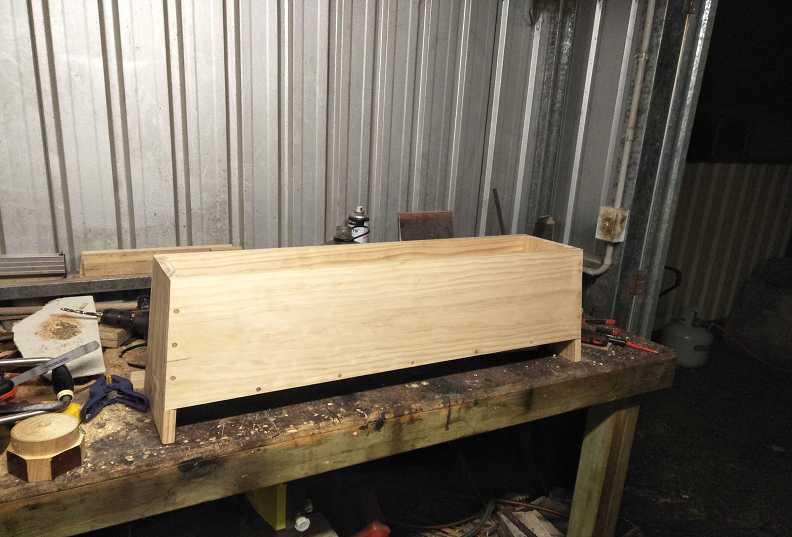
Construction
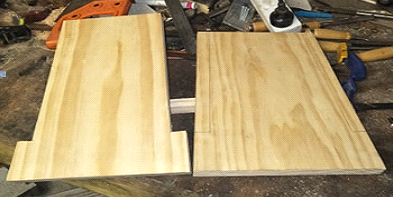
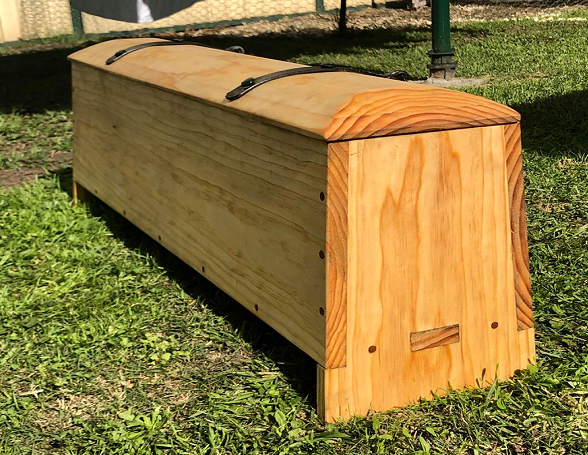
Step 1 – End Walls and Mortises
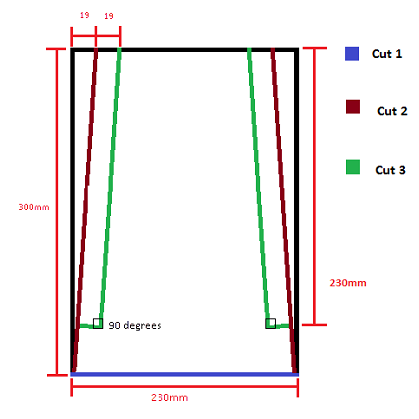
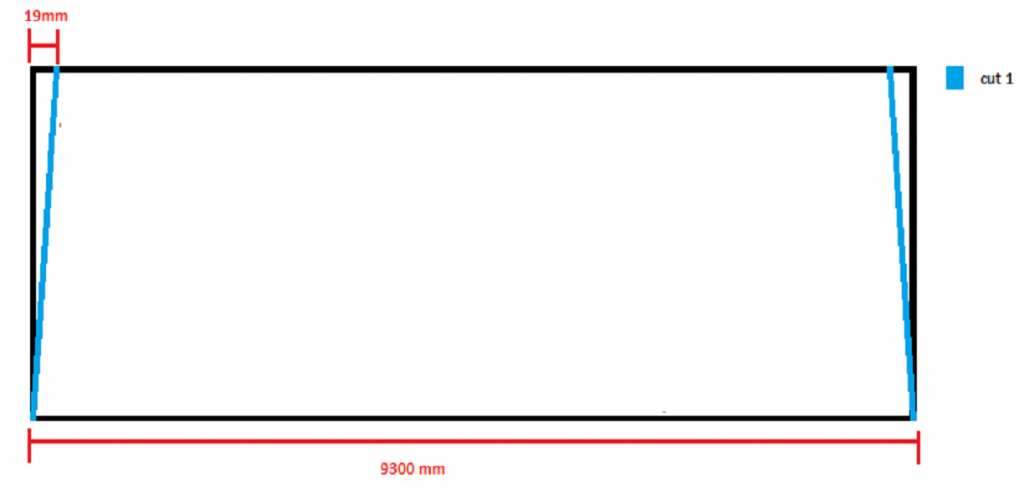
Take two of the pine boards and make “Cut 1” by measure 30 cm for the length of the board. Use a sharp marking knife to scribe the cut across the grain to allow the hand saw a clean start.
The chest has sloped sides which we will establish here by trimming the sides with “Cut 2”.
Measure in from the top corners 19mm and then scribe a line from that make to the bottom corner.
Mark around all four sides of the board using the making knife then using the hand saw rip down that line. Repeat this operation 4 times on each long edge of the two small boards.
“Cut 3” will allow the side boards to sit flush inside corner joints on the chest.
The cut out in the end board is equal to the height and width of the side boards.
Mark out the joint on all four sides and cut it out with the hand saw.
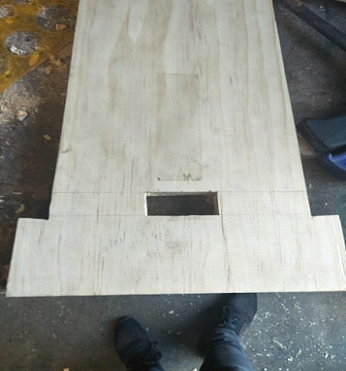
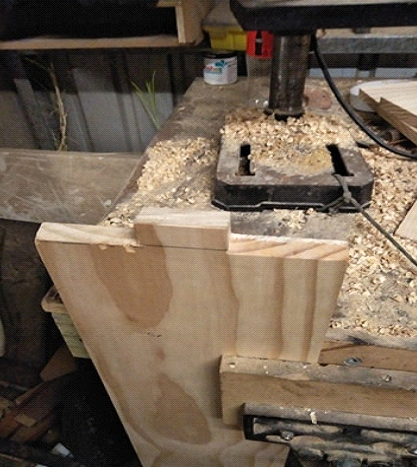
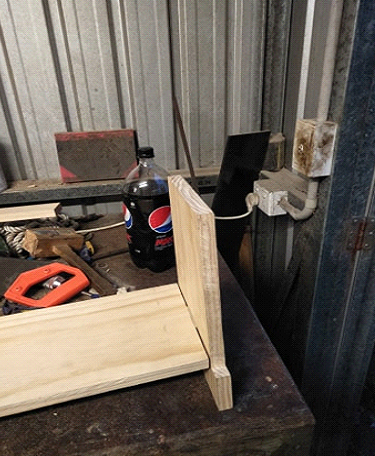
We will need to cut a rectangular mortise in the end walls in order to receive the floor plank.
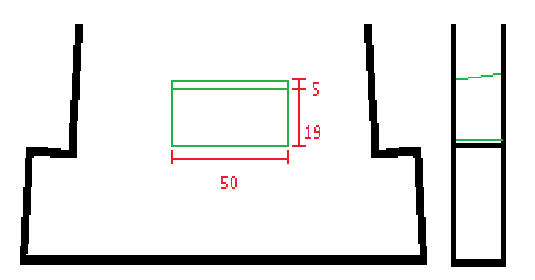
The opening on the mortise on the outside of the box will be 19 x 50mm but because the end walls slops inwardly in the same manner as the side walls it is necessary to cut a relief angle. The opening on the inside of the box will be 5 mm taller (24 x 50mm).
I drilled out the majority of the material with the bit and brace, chiseled it to shape with the mallet then trimmed and neatened everything with the carving knife.
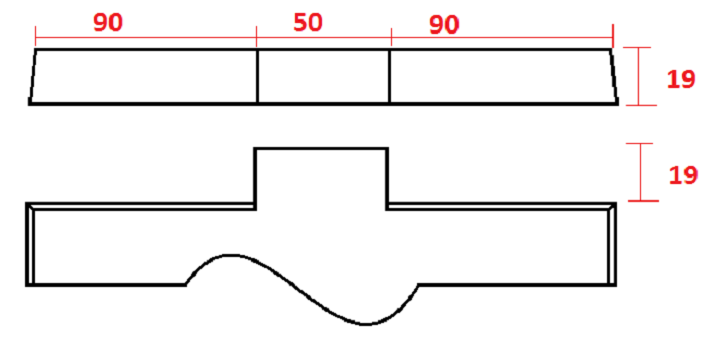
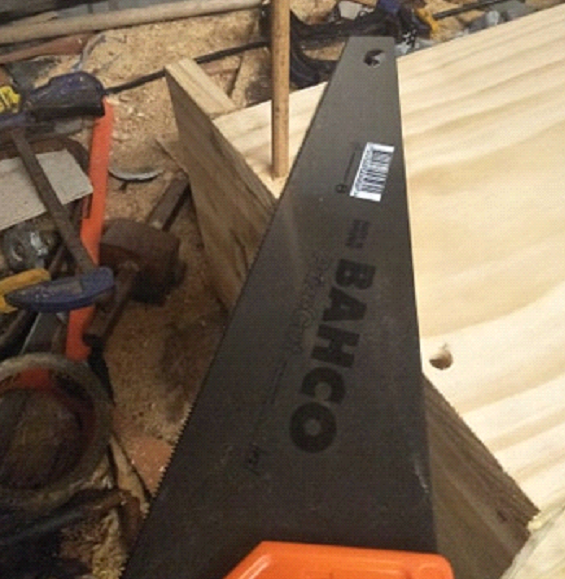
Step 2 – Floor Board and Tenon
The floor board needs to be 9300x185mm we cut the tenons into it.
This will require ripping down on of the reminding whole boards using the hand saw, marking gauge and plenty of clamps.
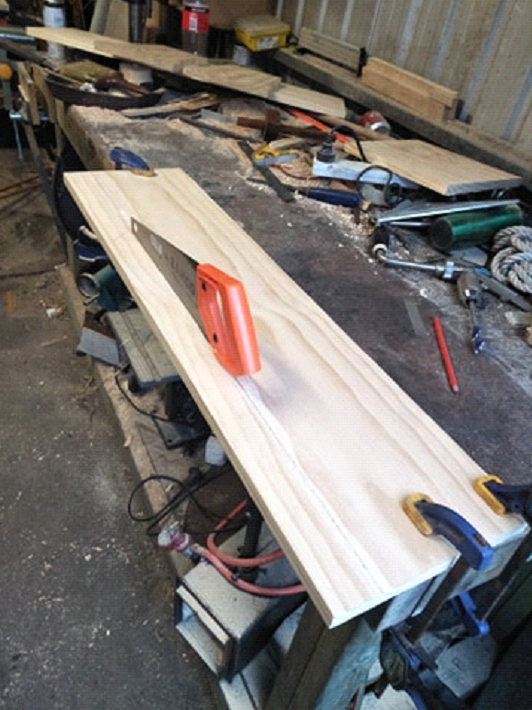
The tenons at each end of the floor board are 50x19x19mm in order to fit into the End Walls.
The easiest way to attack these are to cut it clear with a hand saw then clean it up with the carving knife, the deeper you go with the marking knife the cleaner the cuts will be.

The edges of the floor board need to get trimmed with the block plane and carving knives into a trapezoid.
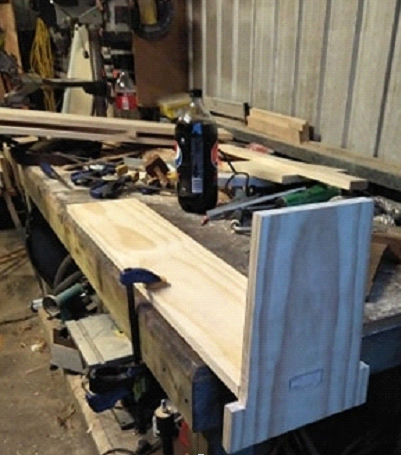
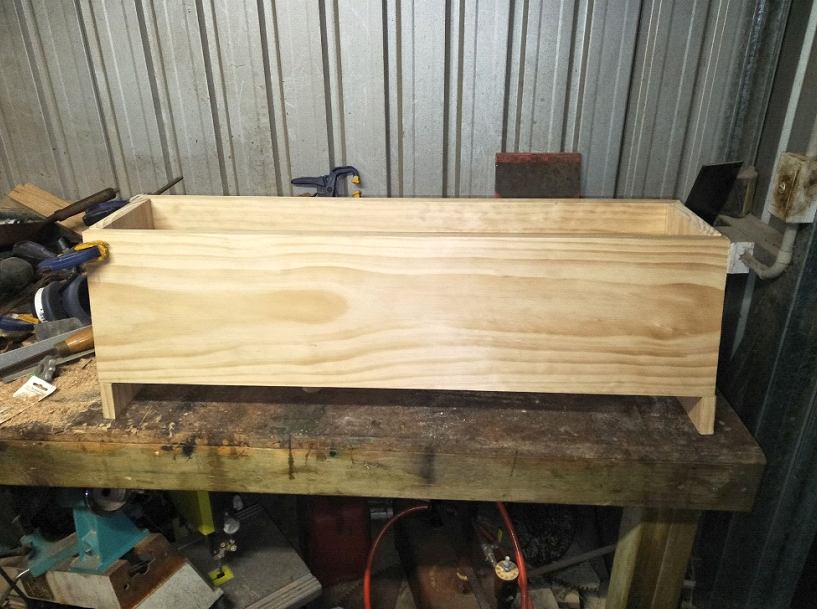
Step 3 – Side Walls and Gluing
Repeating “Cut 2” we made to the End Walls we use the hand saw to angle the ends of side wall. This will allow the side walls to match flush with the end walls at which point we can glue the body together using soft wooden wedges to allow the clamps to sit square.
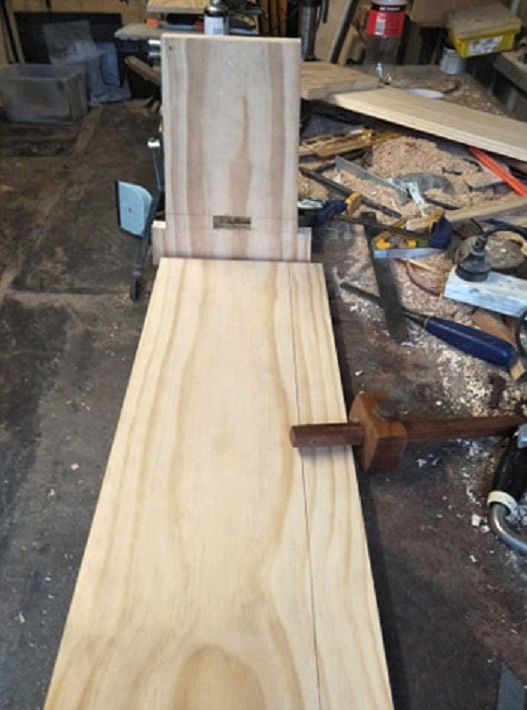
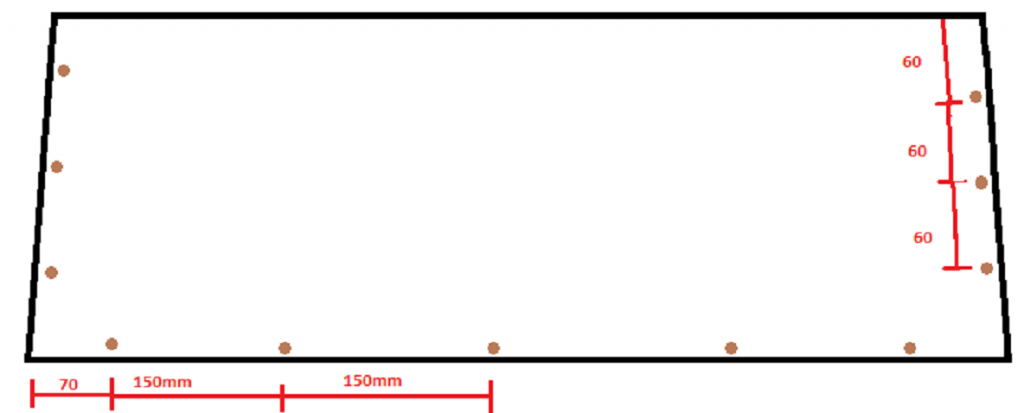
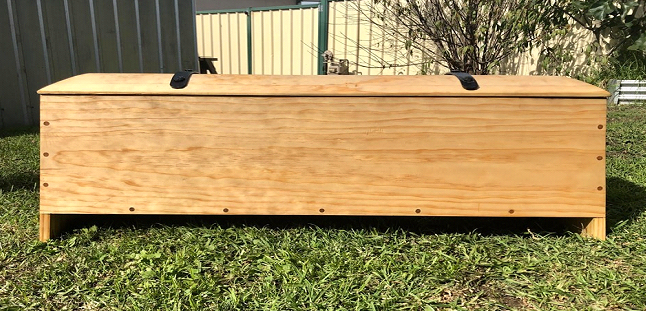
Step 4 – Dowels
Using the brace and 8m bit drill 24 dowel holes 40mm deep. The dowel location is only determined by being evenly spaced. The dowels reinforce the glue and brace the floor.
The easiest way to gauge the depth of the holes is to mark the shank of the bit at 40mm. I chocked the body up on off cuts to level the chest while I drilled to make it easier to just angle.
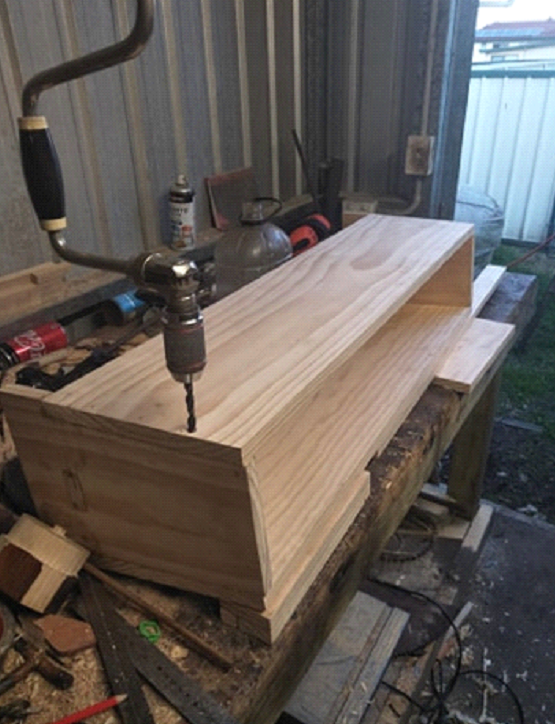
Once the hole is drilled apply glue then gently tape the dowel home with the mallet, then flush cut the dowel. Repeat, repeat, repeat… repeat, etc.

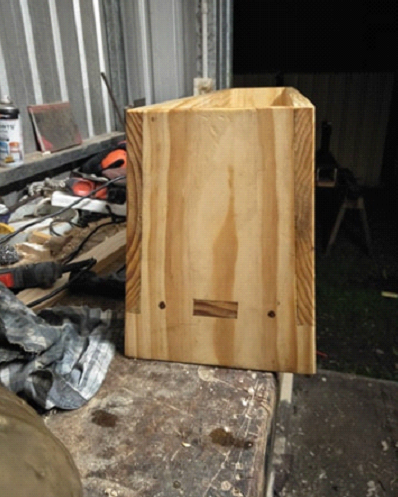
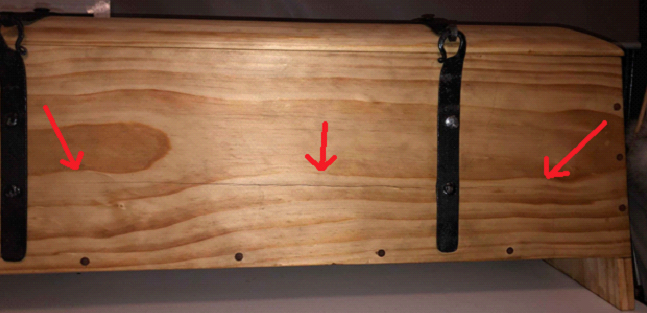
Note: In the last photo you can see how the grain is balanced by making the boards mirror each other to prevent warping. The tension with the grain pulls away equally.
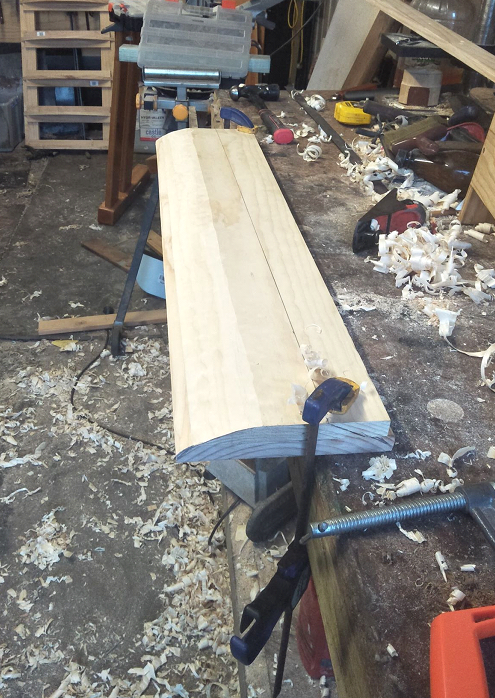
Step 5 – Lid
The original chest has a curved and troughed lid, I don’t have access to timber thick enough to achieve that in one solid piece so I have laminated two boards together. The lid is 10mm longer and wider than the opening of the box. This allows a 5mm tolerance on every edge.
I tried to grain match the two boards as close as possible to help the illusion.
Clamp till the glue dries.
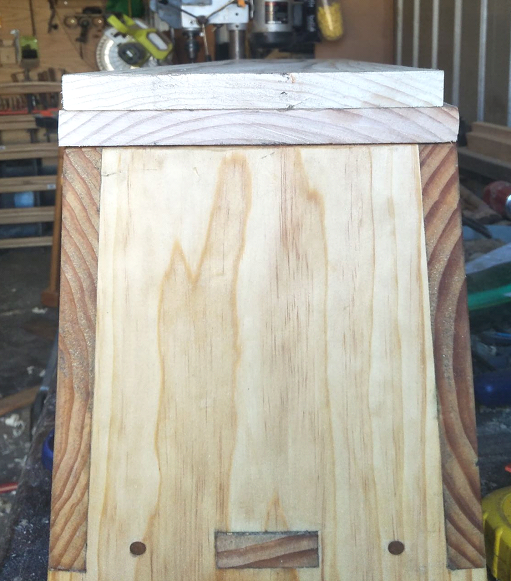
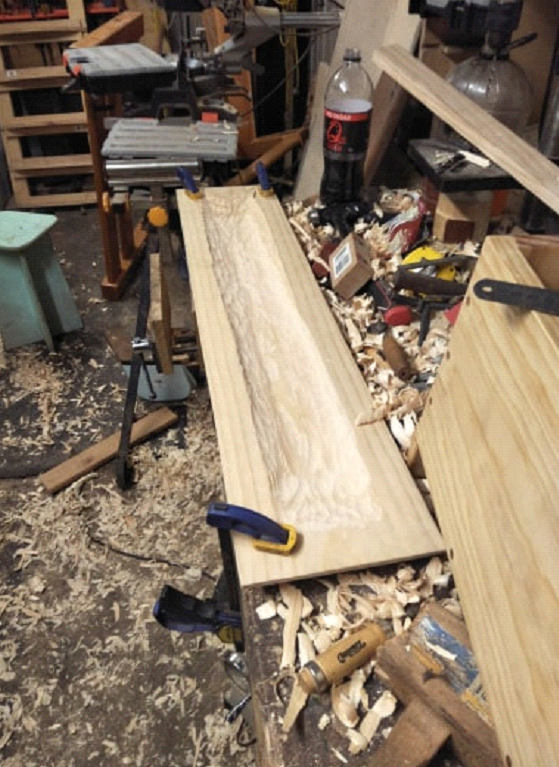
Once the boards are dry clamp on the work bench and plain the top face into a radius.
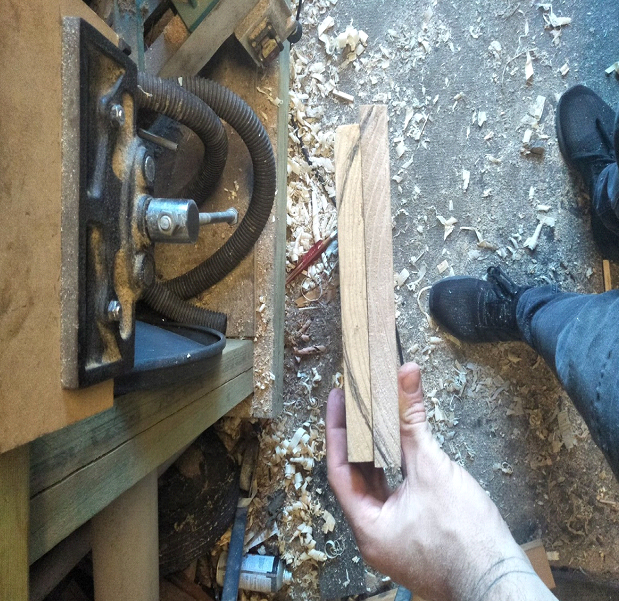
Planing a chamfer into the lids ends requires a jig to hold the work, I used a fixable timber slate and more clamps.
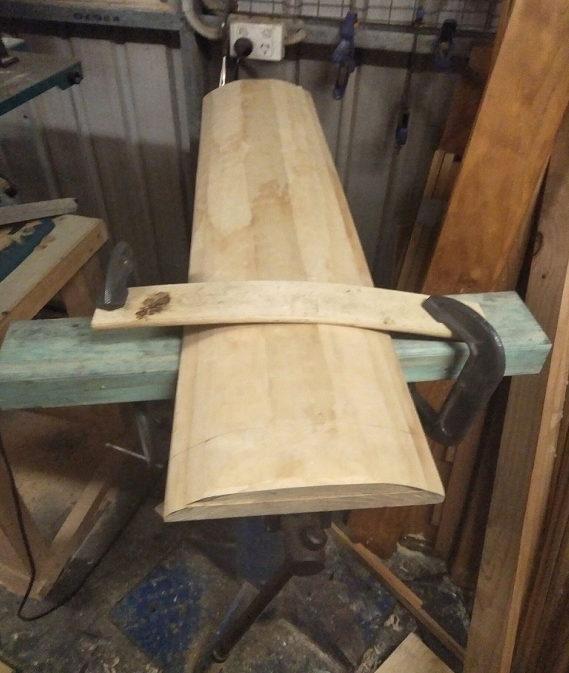
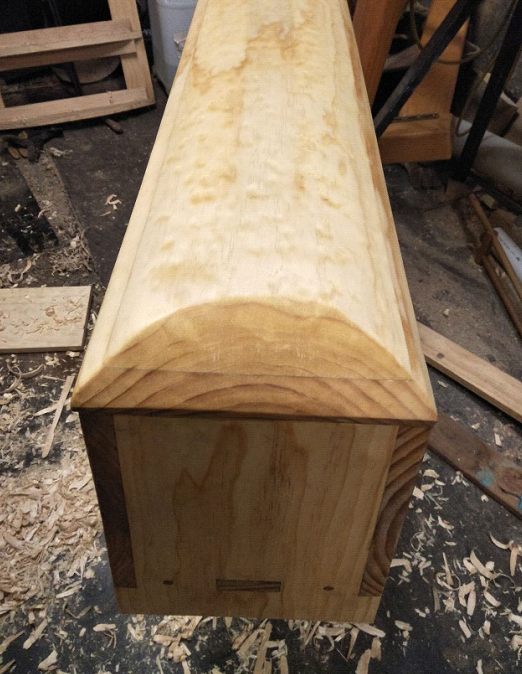
Once the top is dressed, turn the piece over and hollow out a trough till you reach the bottom of the top board. The goal is to have a contestant thickness across the piece. I would recommend using a tool such as an adze or gauge. I personally used a spoon knife which was slow going and destroyed my hands.
At this point we are finished wood working so we can apply a liberal coat of raw linseed oil and allow it to dry.
Step 6 – Nails
To forge nails we need a “nail header” this is a tool found in the original chest which lets you hammer a mushroom top on to a nail with our destroying the shank. This can be
forged form any piece of steel more of about 20mm thick. In my case I used a piece of crow bar.
When the steel is red hot punch and drift a hole though the center of the bar then allow to cool.
Simple drifts can be forged out of the 8 mm round stock that is also used for the nails.
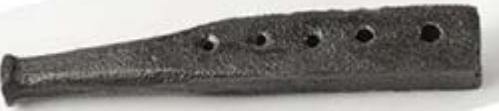
The original is housed in the Stockholm museum (object 107182)
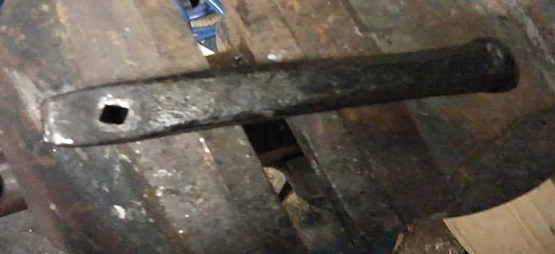
My copy in which I experimented with drifting a pyramid shaped hole.
Forging the nails is a matter of drawing the 8mm round stock out to a point, (the length of which determines the length of the nail), then hot cutting it to overall size.
Lastly we bring the work up to a cherry red heat before dropping it into the nail header and peening a rivet style head.
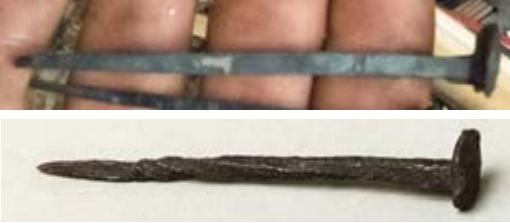
Original nails found in the chest, currently housed at Stockholm museum (object 107193).
In total we require 8 nails (4 per hinge).
Once the nails were all finished I applied a layer of linseed oil to all of them and allowed them to blacken near the heat of the forge. This covers them with a protective coating of polymerised oil which prevents rust and looks quite fetching.
Step 7 – Hinges
There aren’t very many resources for that I could find to give me any specific details on the hinges, so I have made an educated guess at something that looks proportionally correct.
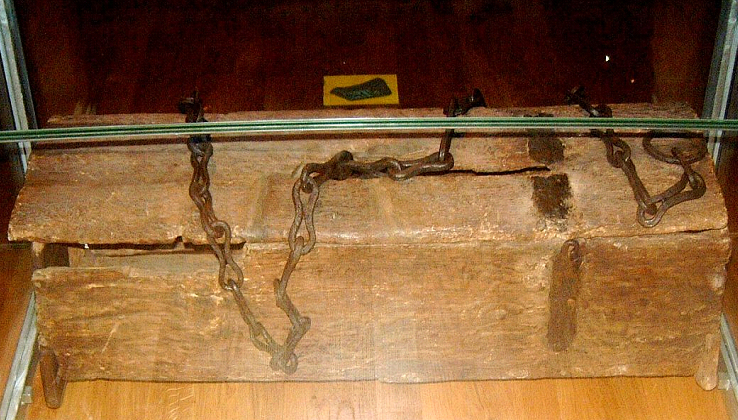
Photo of original. 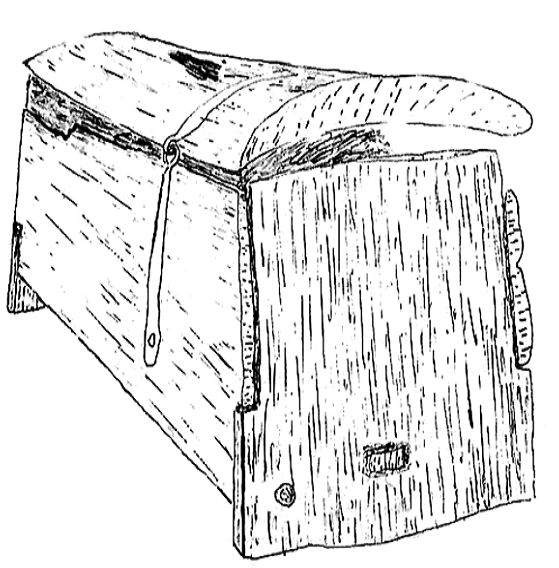
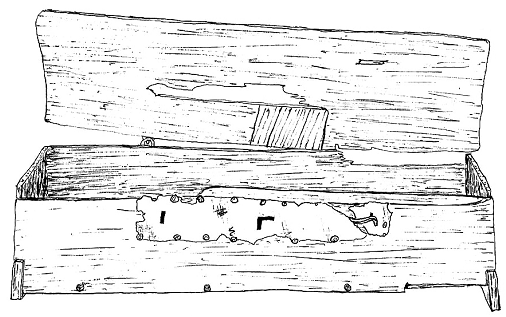
Drawing of original. 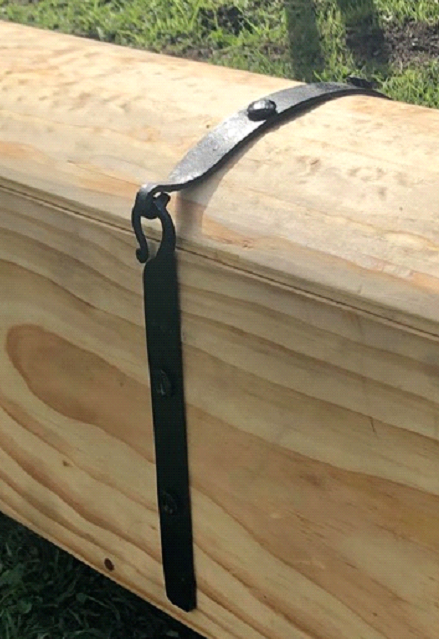
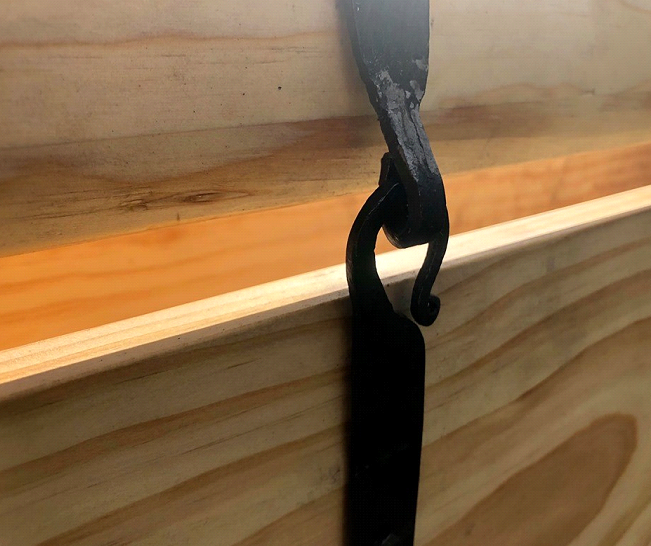
My recreation.
The hinges are forged out of our 20x3mm flat stock and consists of two pieces; the lid side which curves around the top (male) and the box side which includes a curled hole (female).
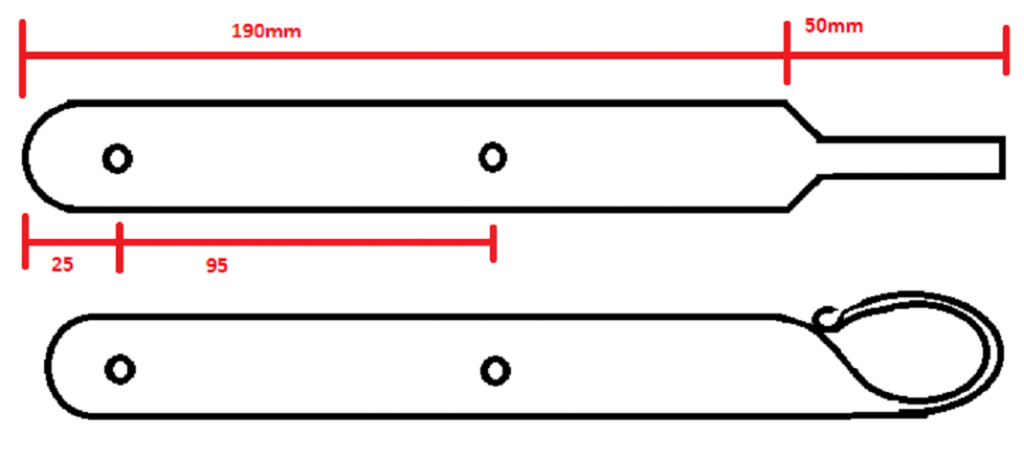

To forge the hinges, heat up your steel then hot cut 4 lengths of steel 200 mm long (I used a block splitter and hammer.) On all four pieces we round over one end and 2 holes punched in order to receive the clench nails.
For the male side draw out a centered tang and on the female draw out a longer thinner tang which favors one side then roll it over.
Once all four piece are forged, heat up the male tang and roll it over so it passes through the female side and pinch it shut so that the opening is down wards.
The hinges were baked in linseed oil.
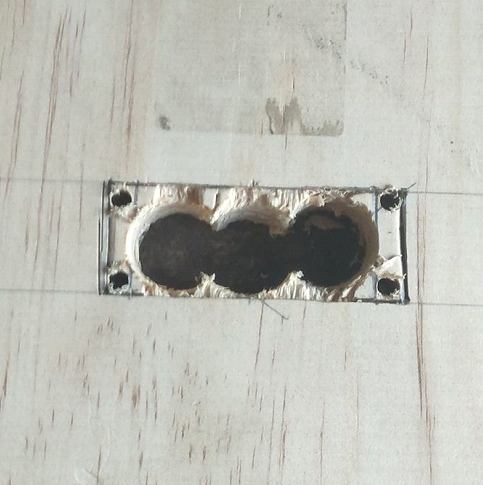
In order to attach the hinges to the box with the large clench nails we need to drill pilot holes with the brace and 5mm drill bit.
Drive the nails with hole pilot holds then bed them over so it can’t fall back out.

Conclusions, Thoughts and Ramblings
What I Like
It looks really neat, taking the time to use purely hand tools made me really slow down and pay attention to each operation. The longer it takes to do each step them more you have invested in total project and of a setback you have trying to rectify mistakes. The box turned out a lot neater then I think I’ve ever achieved with power tools.
Using only hand tools for a project really helps get into the mindset of the builder.
What I Did Wrong
I first tried to drill the pilot holes with a 3mm pilot hole but on the second nail the holes proved too small and I cracked the whole back panel while trying to drive them in.
This are extremely aggravating and I needed to take a cup of tea before continuing.
I also drilled through the bottom of floor plank and had to patch the hole with a mixture of glue and saw dust. I have no evidence for such a technique being used in period of repair but they had glues capable of patching a hole.
What I Would Do Next Time
Next time I would use oak for the body, attempt to craft the planks myself, explore assembling a lock and use the more complex joinery techniques you see in the original such as rebates between the side planks and the end planks.
Thomas Boardmakere is an artisan and fighter from Mordenvale. He is currently building a period pole lathe as part of his entry into the Hordweard, among other projects.