Dark Ages Leg Wraps
By Lord Thomas Boardmakere
The following documentation follows my journey into creating a pair of leg wraps or “winingas” for the 2021 Tocal Arts and Science competition, in the something warm category. I decided that this was a great opportunity to create an item of clothing which would be appropriate for my 9th century Scandinavian persona, Oddr, to wear.
I am hoping to have a finished product that will fit with Viking Age garb in terms of materials, technique, and colour to form a cohesive final impression, but can also function to hold my Birka pants closed around the bottom of my low-profile knee armour, while fighting in SCA heavy combat, to ensure that they do not slip.
This means that the leg wraps need to be long enough to start by wrapping around my feet, wrapping around my calves, and still have length to finish wrapping around my knee cap.
I have never worked with wool yarn before, except for knitting a beanie when I was 14 year old, so this will be a departure form my usual skill set and I have no idea how they will turn out or what I’ll learn along the way.
Inspiration
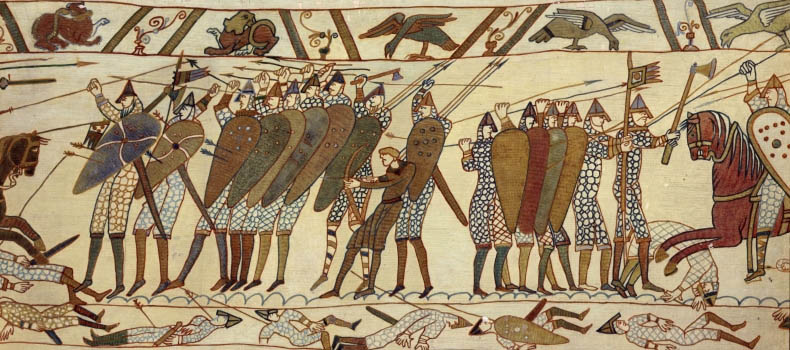
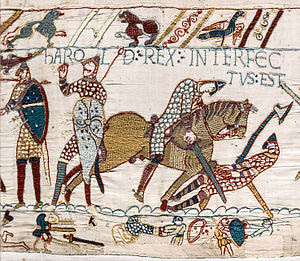
Below are leg wraps as seen on the Bayeux Tapestry, an 11th century embroidered cloth depicting the Norman conquest of England and the battle of 1066. Importantly, in the selected fragments, leg wraps are visibly being worn as the top layer of the lower legs.

This original fragment (left) was one of five consistent with Viking Age leg wraps that were found at Hedeby, as detailed by Inga Hägg in Textilfunde aus dem Hafen von Haithabu.
This fragment is notable for being reasonably well preserved, and as such as the largest of the relevant fragments from Hedeby.
It measures 7.5cm in width, 102cm in length, and the finished edges demonstrate that it was woven to size rather than being cut from a larger woven cloth.
The yarn used was a middle-fine wool, and the leg wraps were woven in a 2/2 twill wool.
Materials
The primary material for these leg wraps was 3 balls of pure wool yarn. These were purchased from Spotlight as I have not yet developed the skills and do not have the time to produce large quantities of high quality yarn.
I have chosen what I have found to be a historically plausible red colour, which would have been achieved in period by dying the wool with either Madder imported from relatively local destinations such as Germany, France or the British Isles, or the significantly more exotic and expensive Mediterranean Kermes.
Although madder does not grow in Scandinavia, it has been identified in a large amount of fabric remains from throughout the Viking Age. This points to its importation, which would make it a more expensive dye than locally sourced colours although still within the reach of my impression’s social class.
I decided to include small cosmetic sections of natural white hand-spun wool at regular intervals in order to break up the consistent red colour and give me the chance to practice spinning wool. This is a compromise that both demonstrates art of hand spinning while allowing me to benefit from modern machine spun yarn.
The hooks for the wraps will be made from copper sheet as it is a material readily available in both modern and historical times, and most winigas hooks from period were made either from copper or a copper alloy.

c. 8th – 10th C. CE, Found in England.
Loom
I began the weaving process by creating a rigid heddle loom. Evidence for rigid heddle looms used in period to weave bands exists in the form of the heddles themselves. These small ‘looms’ were a very portable, easy to use solution to the necessity of needing small bands in period – they could be woven by attaching one end of the warp to a belt, one end of the warp to a stick held between the feet to control tension, and the entire thing could be packed up or moved at a moment’s notice. The only real weakness of this design is that the bands woven based on the heddles found would be much too small for my purposes.
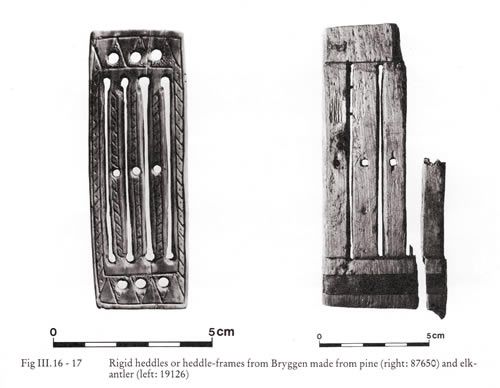
The above examples were found in Bryggen, Norway, and date from the 12th C. CE, but other examples have been found as early as 3rd C. BCE in Hungary.
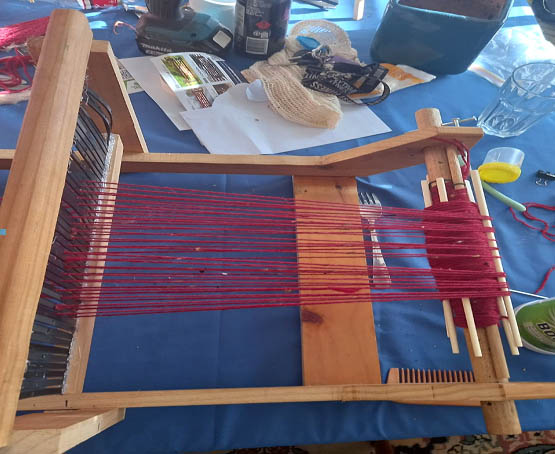
Soft heddled looms were likely in more common use to create wider material lengths. These would usually take the form of large standing warp-weighted looms. One of these looms is on my list of projects to tackle in the near future. However, due to current space and budget constraints, I have created a rough rigid heddle loom that works on the same basic principle as a warp-weighted loom and is possible to use entirely on your lap.
The heddle is made from zip ties cut and in half and the two turners use nails as slip pins to create tension where needed. Although not an entirely period correct loom, it resulted in a period correct tabby weave, and as the leg wraps are the goal of this project, I believe that this home made loom was a good compromise.

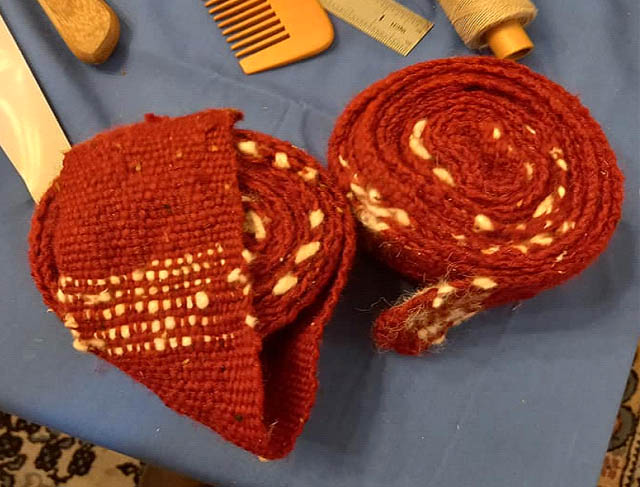
Other Tools
The other tools used in this project were a large sewing needle for wool, shuttle, drop spindle, wool combs, and scissors. Additionally, I found a kitchen fork a very useful friend for neatening and beating the weft down.
In order to engage with the project deeper I decided to spin a small amount of yarn myself from raw wool fleece. For this I needed a drop spindle and wool combs, which I have made based on examples found at Coppergate.


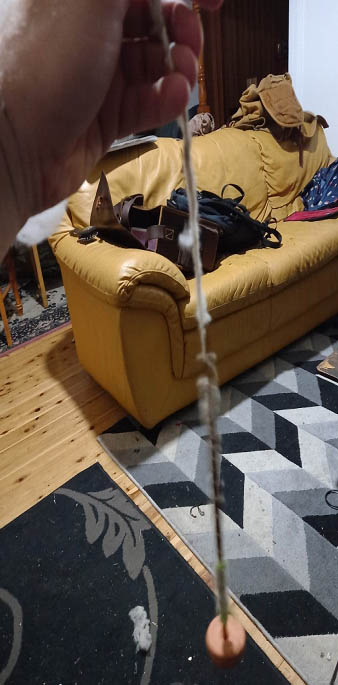
The spindle of my interpretation (right) was made from Tasmanian Oak, and the whorl was made from unfired clay.
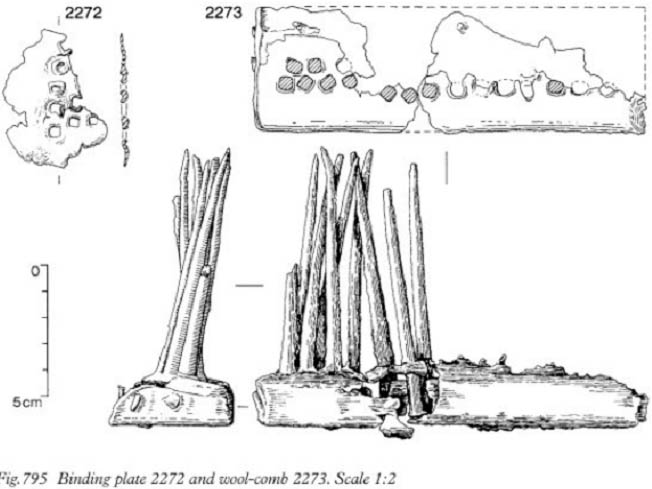
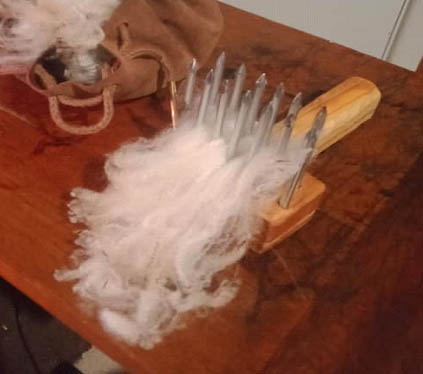
Wool combs from Coppergate (left), and my interpretation of them (right). My combs were made with steel nails as pins and pine for the handles.
Spinning
I began by combing the fleece and spinning the yarn to be used in the hand spun sections of my leg wraps.
Spinning is a whole skill set that I have barely scratched the surface of, but it helps to know how much goes into creating the materials you’re working with. Only a very generous spinner would call what I produced “yarn,” but, fortunately, the nature of the weaving means that even the most crudely woven wool holds together as weft.
Weaving
Once we have the wools and our tools, we can begin the first step in the weaving process, which is warping up our loom.
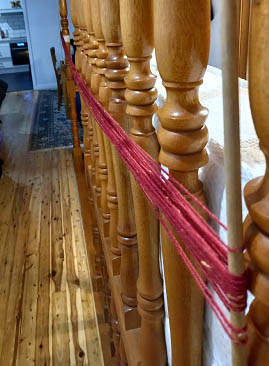
I created loops of yarn 5m long by wrapping it around to sticks secured in place. The sticks could then be lifted off the wall and wound onto the loom until all the wool is up one end.
This process is greatly helped by an extra set of hands.
Once on the loom, the ends can be cut and pulled through the heddle, so that when the heddle is lifted one of every two threads is retained while every other thread can side down or up depending on the direction of travel.
I found that some extra sticks wound in with the warp helped to keep everything neat.
This very much becomes an exercise in yarn management. Spend as much effort here as you need to keep the tangles out. Tangles will slow your progress way down later if they build up.
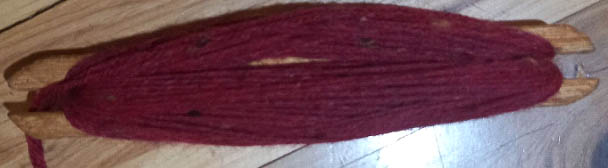
The last tool to organise in order to make this process more manageable is a shuttle to hold the weft while working.
For this project, I decided to use the simplest weaving pattern I could – 1 x 1 basket, or tabby, weave. In this simple pattern the warps and wefts cross each other at 90 degrees and give the image of little squares. This is an ancient technique and was still in use in the Viking Age, and is very common even today.
Many period examples of leg wraps were woven in a twill to help with elasticity; however, due to my intended use of these wraps and the common nature of tabby woven fabric, I did not consider learning to weave a twill within the scope of this attempt.
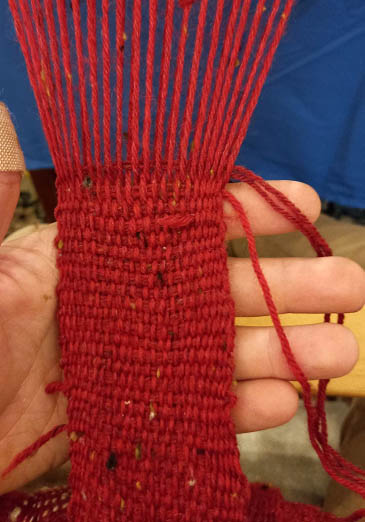
The process of weaving in this pattern is very simple – lift the heddle, pass the shuttle through, lower the heddle and pass the shuttle through again.
When I first began weaving I had 30 warp threads (the vertical yarn), but after about 10 cm I found this to be too narrow for the project so added 5 more either side of the project, to bring the total up to 40 warp threads. This created a finished piece that was 75mm wide. I cut the narrow piece off later.
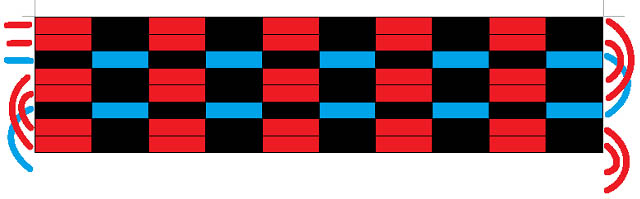
As I wove, I experimented with a few different ways of laying the weft in and found that the style I liked the most was a combination of 1 x 1 and 1 x 2, where a double weft runs through every second row, and the 1st row is a single weft created by its own thread.
This started as a way to use up off cuts and scrap, but I found that it made a more constant over all product and covered ground more quickly. It also made it easier to splice in yarn as they started and stopped.
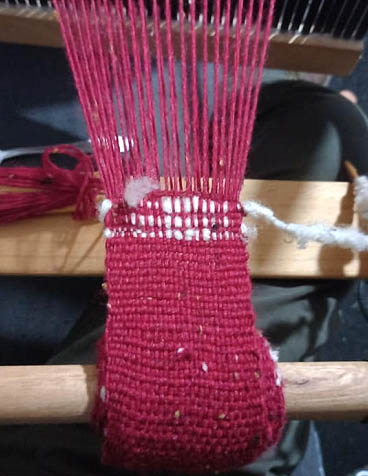
Every 40cm or so I replaced the single weft with some of the hand woven yarn for the course of 5 rows, then would return to red.
After several sessions of weaving, this first batch came to an end, and I sliced it off of the loom and sewed the free ends back down to warps to seal the end. This run had turned out to be 3m long.
This is the same length as another pair of leg wraps that I own, however this pair is not as wide, so I judged I’d need to add a meter to the end of it.
This time when I warped, I started with 10 m of warp between my wall and the kitchen cupboard door. This would give me enough for second leg wrap and an extra meter for the first one.
However, when I began rolling these onto the loom, it became very tangled and I had to separate each individual thread and then tie them into batches of 5 once they had been passed through the heddle.
Something I didn’t account for when using 10m of warp was that this made keeping tensioning consistent over that length much more challenging.
I attempted to resolve this on the fly by adding tensioning bars in the form of chops which happened to fit in the ratchet holes. This gave the slack somewhere to go without the need to be cut off.
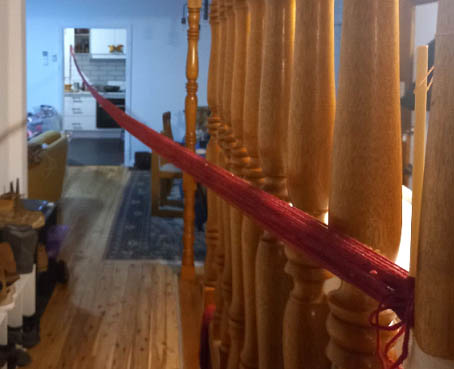
Once I had finished weaving 5 meters on this batch I tested it on my leg and decided 4 meters was the right length with 1 m left over. I cut it off the loom, leaving enough loose warp to left over so that I could splice the new wrap to the old wrap, creating an eight meter piece. I then cut this in half and finished the ends, creating two 4m leg wraps.
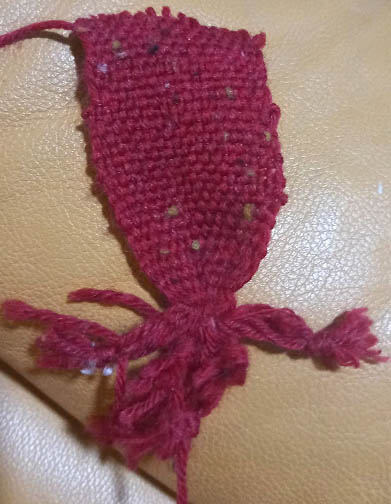
When finishing the cut ends I sewed them into triangles to receive the hooks.
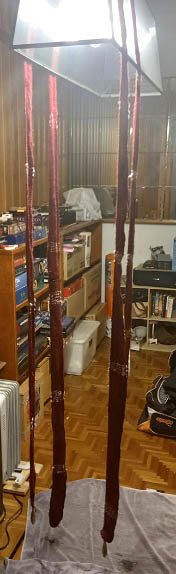
Now that the weaving was finished the woollen fabric could be wet set.
Wet setting locks the fibres into place and helps stabilise the piece. This was done by soaking the leg wraps in hot, soapy water and agitating them. If I was to do this long enough it would become felt but we only want the fibres to sit neatly, not change state. They were allowed to dry under slight tension to keep everything straight, and to take out some of the tension errors.
Hooks
The hooks were cut out of the piece of copper pipe.
I hammered the pipe flat, and then sawed and filed them into shape as a pair. I then separated them for sanding, bending, and drilling.
I experimented with a few homemade triangle punches, with you can just see as a “shadow” under the ones I ended up using. I also did some straight chisel marks on what turned out to be the back of the hook that I didn’t like the effect of. The particular punches I used in the end came from a packet of “mandala” punches sold at Spotlight. They fit with in the triangle motifs you often see on jewellery from this period.
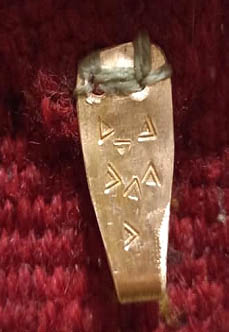
The placement of punch marks in period examples can range from very geometrically placed to randomly punched in. I went with tastefully random.
Finally, I sewed the hooks on with linen, and they were finished.

Reflection
The leg wraps were a super interesting project.
It is always humbling to enter into a completely new style of project, for which you don’t not have a foundation in at all. The new technique and materials force you to grow as a maker and the problem solving seems so fresh.
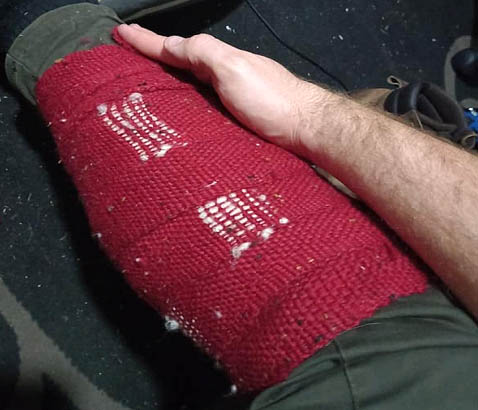
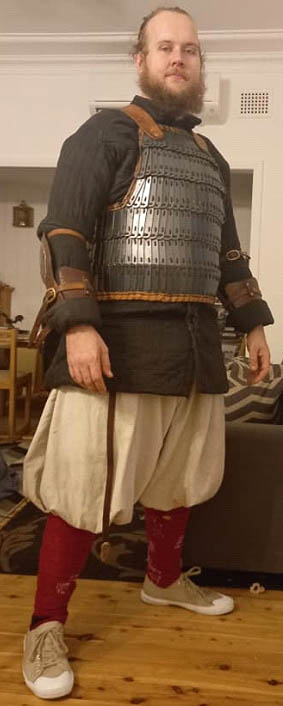
The leg wraps were a success in terms of their final product – they look good, and function as intended. They hold up my knees and do not slip off or move around while I fight.
I think what I would do differently next time would be in the selection of type of loom. I would be much more likely to select a loom where the warp is weighted but freely separated. This would prevent the tension from creeping. At the end of this project one side was much tighter than the other. This was due to how the warp unwound itself off of front roller.
This would not be an issue on a standing loom or inkle loom.
Next time I would like to try a herringbone twill weave, to see how they behaved differently when worn. I would also like to try different coloured wools in the warp and weft even if there were similar, like a grey and blue, or dark green and light green.
I would have to practice spinning a lot to get good enough to create fully functional yarn, and for the limited weaving I plan to do in the future, I’ll probably stick to buying it from those who do it better.
Selected Bibliography
| Bayeux Tapestry. ca. 1070. Tapestry. Musée de la Tapisserie de Bayeux, Bayeux, France. |
| Bayeux Maille. 2019 myArmoury.com discussion forums. http://myarmoury.com/talk/viewtopic.37343.html |
| Plant-Dyed Yarn. 2019. Dagny Sveinsdottir. https://sites.google.com/view/for-the-hordweard/ii-the-journey/plant-dyed-yarn |
| Ancient Viking and Anglo Saxon Artifacts for Sale. Gabriel Vandervort. Ancient Resource http://www.ancientresource.com/lots/medieval_crusades/viking_anglosaxon_norman.html |
| Clothing in the Viking Age. William R. Short. Hurstwic. http://www.hurstwic.org/history/articles/daily_living/text/clothing.htm |
| Wool Combs. 2020. Bjorn Saemundarson. https://bjornthisway.wordpress.com/2020/02/07/wool-combs/ |
| Textilfunde aus dem Hafen von Haithabu. 1984. Inga Hagg, et al. |